Create virtual partition
To create virtual partition in Active@ UNDELETE proceed as follows:
1. Select disk (physical device)
- Select a disk (physical device) node in Recovery Explorer. Use
Expert Device View, Partition View or Enhanced View modes.
- Select a disk (physical device) node Partition Manager device list or in Disk Navigator tree.
2. Open the Create Virtual Partition dialog
- From the Partition Manager toolbar click Create Virtual Partition button.
- Use command Actions > Create Virtual Partition from main menu
- Right-click the selected item and click Create Virtual Partition command from the context menu.
3. Adjust dialog options
Use sliders to specify partition boundaries - offset and size. Mouse click on partition box will select virtual partition boundaries.
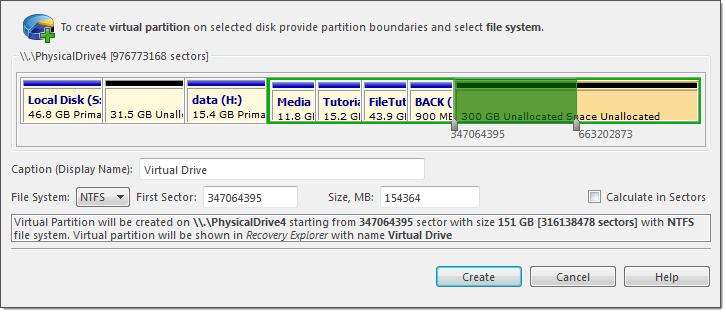
Dialog options:
- Caption
- Text label to mark created virtual partition in Recovery Explorer
or in Partition Manager.
|
- File system
- Select file one of the supported file systems: FAT, FAT 32 or NTFS.
|
- First sector
- Offset of virtual partition in sectors or in MB.
|
- Size
- Size of virtual partition in sectors or in MB.
|
4. Click Create button
Result
After command is complete, newly created virtual partition will appear in
Recovery Explorer ready for applicable actions, such as volume scan etc.
See Also
Volume scan |
Scan for files by their signatures |
Recover files and folders |
Virtual disks