So, you have accidentally deleted photos on your camera’s SD Card and don’t know how to bring them back? Fear not, we got you covered! Deleting photos on your camera’s SD card happens more often than you would think and recovering them is quite easy.
As we mentioned in our previous data recovery articles, the “deleted data” is not really deleted, it is only being declared “unavailable” by the current operating system. Therefore, recovering the data, or photos in this case, should not be the problem as long as the new data hasn’t been saved in disk sectors in which old “deleted” data is still present.
If something like that happens it should be noted that the recovery will be quite difficult, files might not get recovered completely or not at all. With that in mind, if you want to recover your deleted files do not save anything on the drive where they have been previously stored. For the purposes of this demonstration, we will be using Active@ UNDELETE.
Before doing anything, first, we will need to scan the drive (SD card in our case) that still has our deleted data. Right-click on the drive and choose Scan from the context menu.
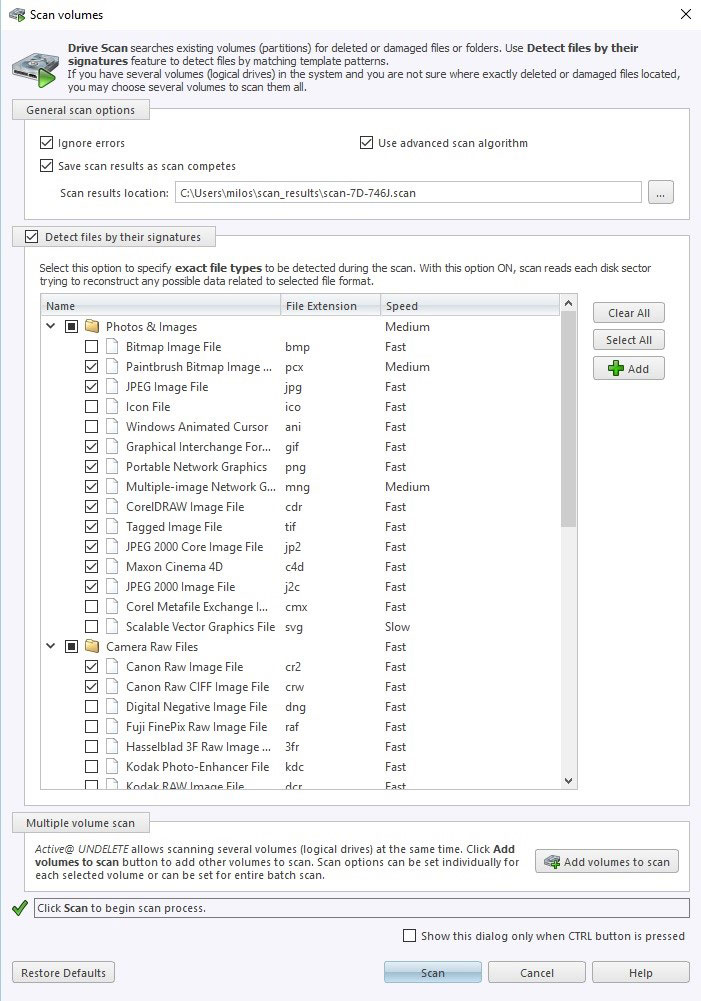
In the next window you can specify which files detected by their signatures do you wish to recover. If you are recovering photos feel free to check Photos & Images and Camera Raw Files sections, you can reduce the search time by checking the exact file signatures that you want to recover.
If you are unsure in regards to what exact file types you want to recover just check them all by default, it might take a bit longer but it is OK to make precautions. Active@ UNDELETE supports a variety of file types distinct for various camera manufacturers, so you can be sure that you are covered regardless of the type of camera you are using.
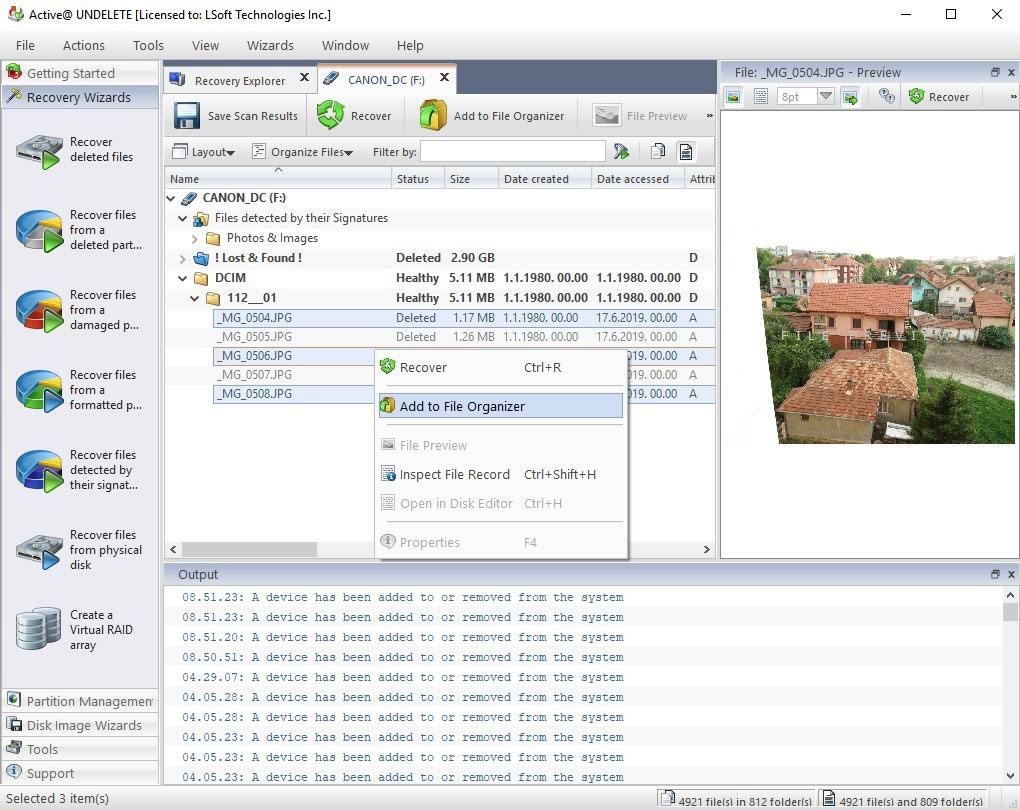
After the scanning is finished, we can proceed with the recovery. Active@ UNDELETE has successfully located deleted files and can even show them in the preview window.
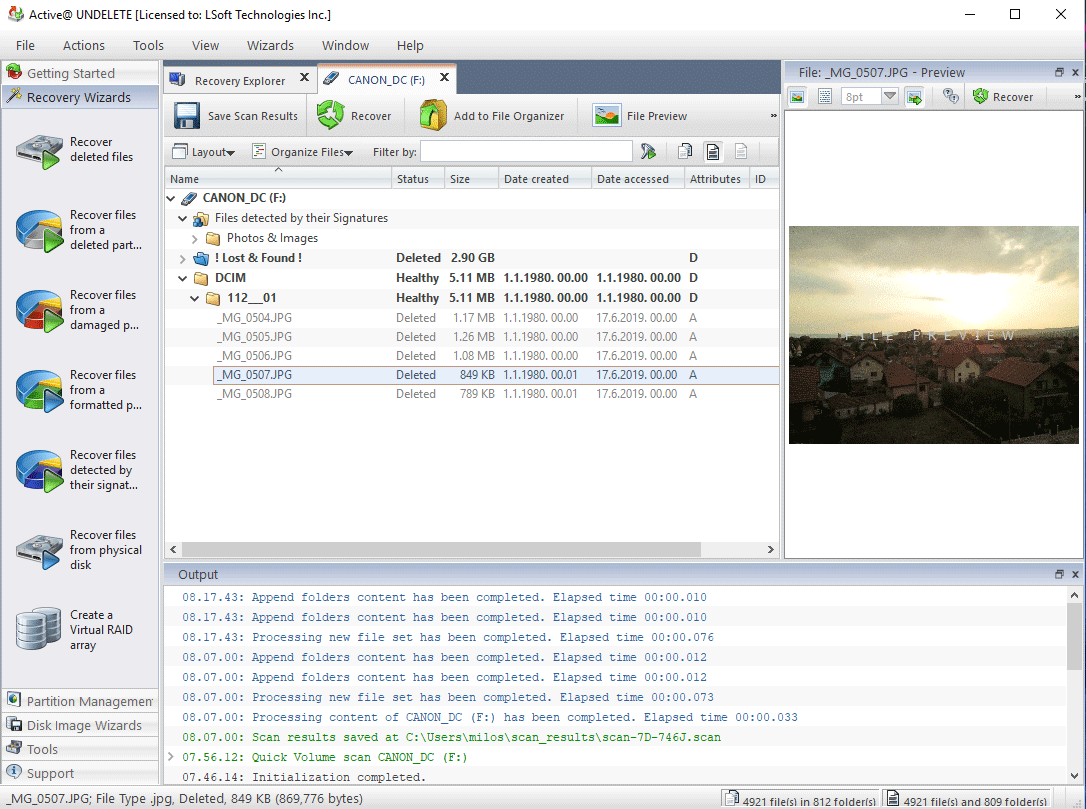
If you do not want to recover all of the files but only some of them, by holding CTRL key and clicking on them you can select them (just like you do in Windows) right click on them and add them to File Organizer.
Within the File Organizer you can organize files, create rules and manage them. This is very useful if you have a lot of files that you want to recover and it is time intensive to find them all based on their name, file type, date of creation etc. Organizing files, creating and managing rules is a topic that we will revisit in one of our future blog articles. In the bottom pane you will notice that Active@ UNDELETE has selected a recovery destination by default to a C: partition, if you wish you can change that but bear in mind not to recover files on the same location (SD card in this case) where they were deleted.
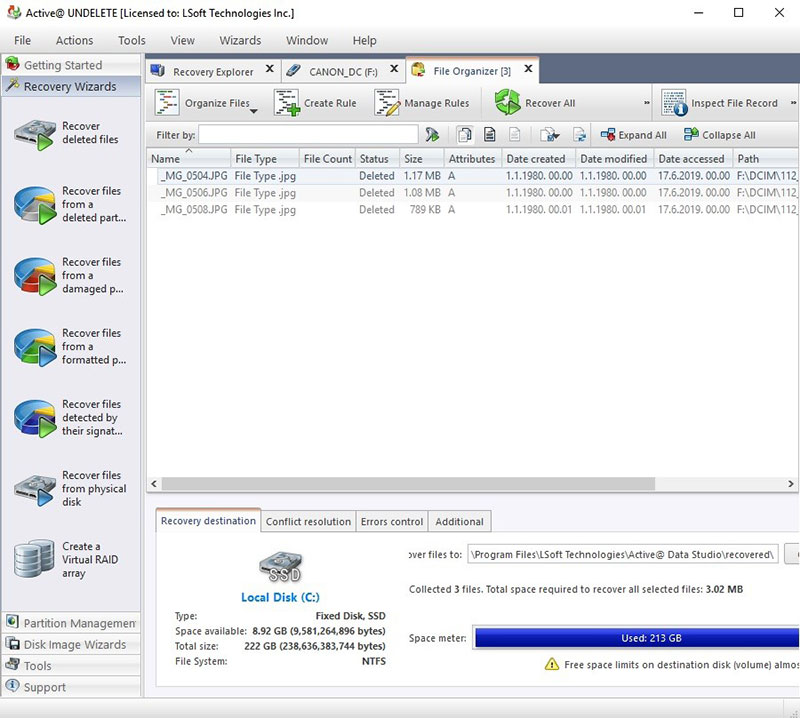
By clicking on Recover All the files will be recovered to the set destination and ready for use.
Download Active@ UNDELETE DEMO