For any one of a variety of reasons, a disk's logical structure can become damaged so that it can no longer be recognized. Today, I'll show you how valuable data can be recovered in just 5 easy steps by using Active@ UNDELETE.
At first, you will notice that the corrupted disk in the list of devices within Windows Disk Management or in Active@ UNDELETE appears as Not Initialized.
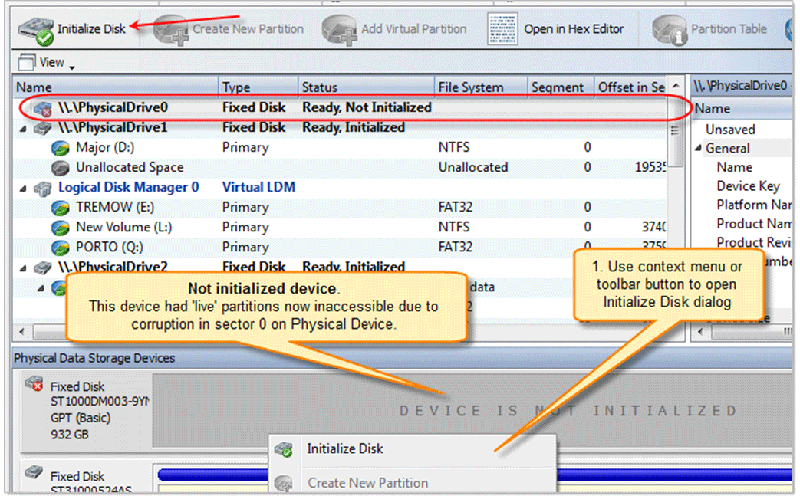
So our first step would be to properly initialize the disk.
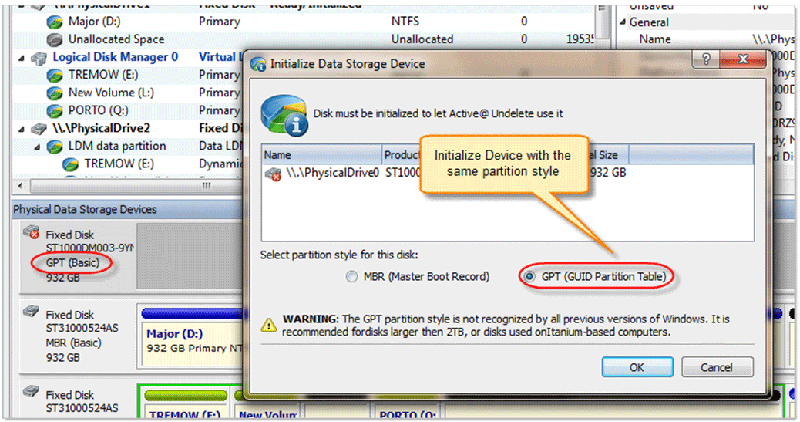
In general, that means setting up the proper partitioning style for the data storage device. You have two style options: MBR (Master Boot Record) partitioning, tends to be used on older versions of Windows OS and a second, more modern style, – GPT (GUID Partition Table) partitioning.
The second partition style will let you to have larger and an unlimited number of partitions on your device.
For recovery, it is very important to note that you should set exactly the same partitioning style as was on the disk before the corruption occurred. Active@ UNDELETE presents you with a clue as to the partitioning style the device had.
Start Active@ UNDELETE (if you haven't already).
Open the Partition Manager View by using the toolbar or in the context menu for corrupted device select the Initialize Disk command.
The Initialize Data Storage Device dialog will appear. Select the proper partitioning style (GPT in this example) and click OK to initialize the disk.
Note, that the partitioning style must be the same as it was originally set to.
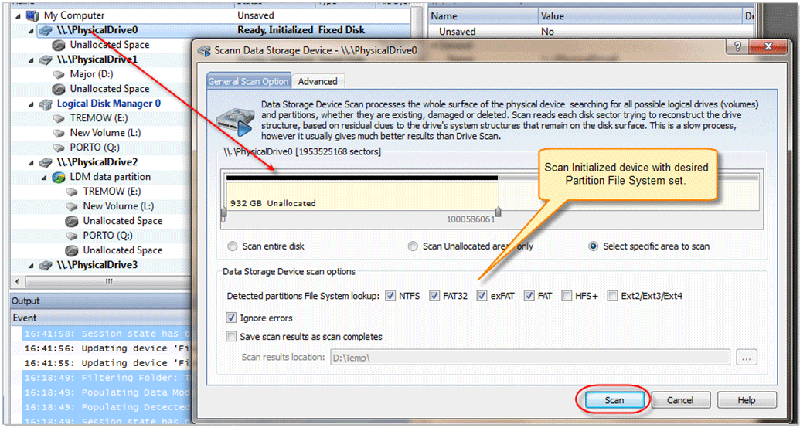
The disk should now be properly initialized but without any partitions on it yet. To find partitions that use to exist on the disk, you should run a Disk Scan for partitions.
Select the disk which was just initialized and click the Scan button or use the context menu command to bring up the Scan Device dialog.
Select the area you wish to scan (or simply select the partition's file system to look for and click Scan to initiate the process.
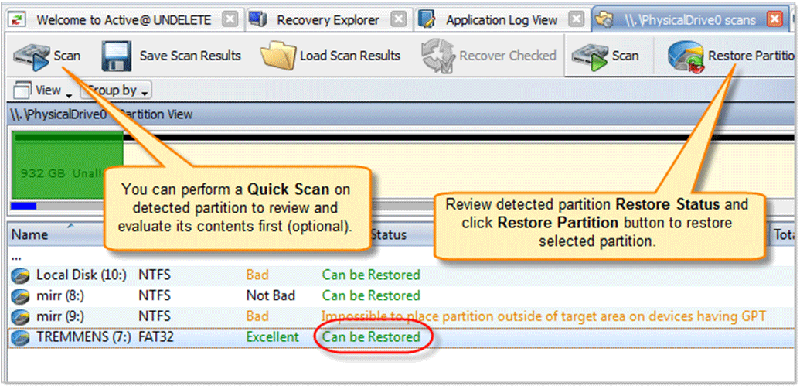
During the scan you will see detected partitions as soon as they found. If the one you are looking for appears, you can interrupt the scan by clicking Stop and proceed to the next step.
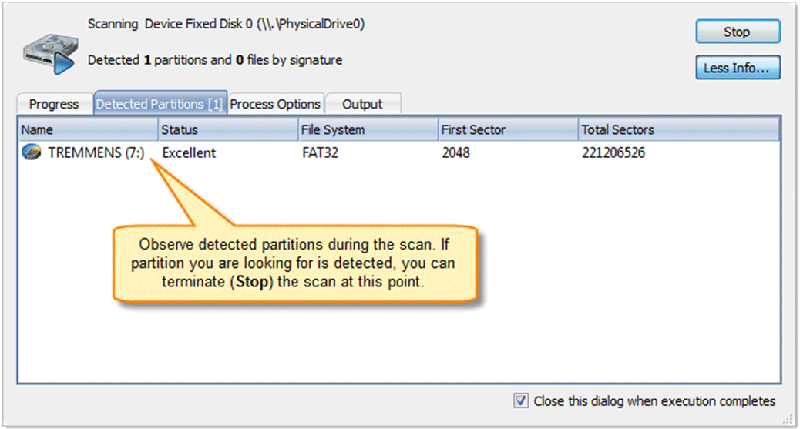
Whether you have stopped the scan or it completes on its own, you will see a list of detected partitions in the Scan Results View. Evaluate these detected partitions by scanning them individually.
This will let you verify which one contains all the data you looking for.
Advice: You may use the Recover Files feature to recover all your files from the detected partition first. As your data is crucially important, it can be saved to a safe location before you proceed to the stage of restoring the partition.
If the partition you are looking for has a status of "Can be Restored" you can try to restore that partition.
Select the partition in the Scan Result View and click the Restore Partition button from the toolbar or use context menu to select to restore the partition.
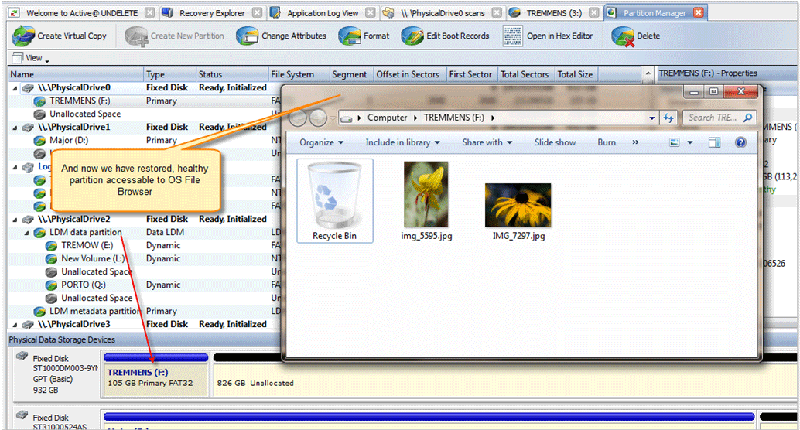
After the command is successful, all your files will become accessible from Windows File Explorer and you partition is back to life again :
Until next time.