Active@ UNDELETE ver. 7x
See documentation for latest version
Filter detected partitions by certainty
After you complete a scan, detected partitions are listed in order of their certainty status based on attributes and validation level. To make a long list of partitions easier to read, remove partitions with status Bad and lower using a filter.
To filter detected partitions:
- In the Scan Results node, select a device node with detected partitions.
- To open the Filter Detected Partition dialog box, do one of the following:
- From the Recovery Explorer toolbar, click Filter Device Scan Results.
- Right-click the partition and click Filter… from the context menu.
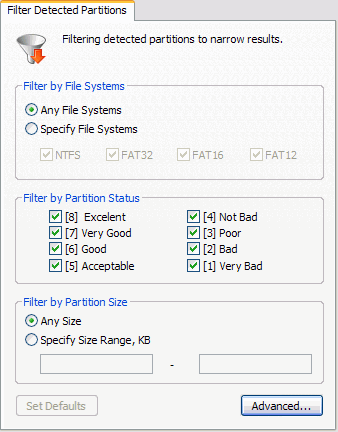
- In the Filter Detected Partition dialog box, do the following:
- To filter any file systems, select the Any File Systems check box.
- To specify file systems to filter, select Specify File Systems and select the check box next to all file systems to include.
- To reduce the size of the partition list, select the check box only next to the status settings that you want to display.
- To display any size of partition, click Any Size.
- To restrict the size of partition to display, click Specify Size Range, KB and enter the lowest and highest partition size.
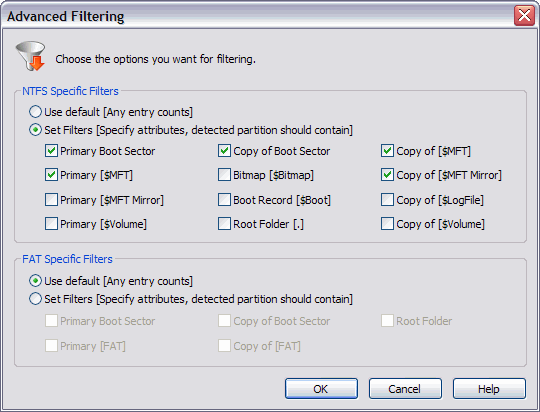
- To set advanced filter options, click Advanced and indicate each FAT or NTFS attribute in the Advanced Filtering dialog box appears.
- Click OK.
- Press Set Defaults in the Filter Detected Partition dialog box to cancel
partition filtering.