List of logical drives available for Active@ UNDELETE can be seen in "My Computer" tab. Select "My Computer" node in Recovery Explorer tree to see list of all logical drives (including detected deleted partitions, see Recover Files and Folders from Deleted Partitions) organized in groups by Data Storage Devices.
You can also view and select logical drive in Recovery Explorer tree (left pane).
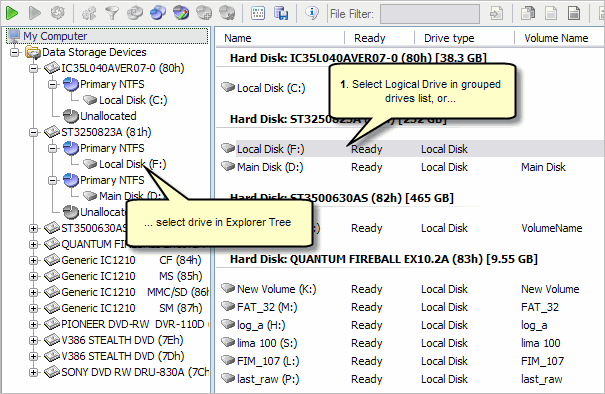
Not only existing logical drives can be scan for files, but also detected partitions, virtual drives or even drives from assembled RAID's.
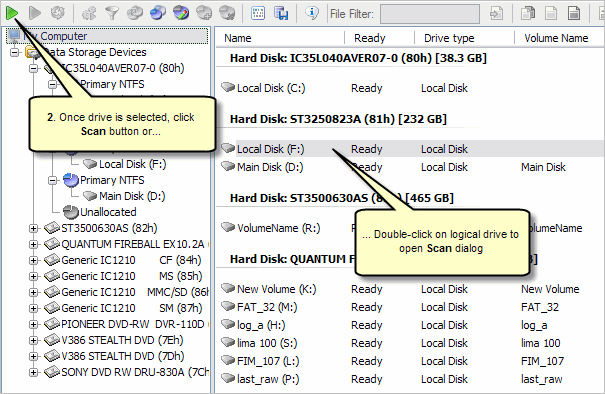
From the Recovery Explorer ("My Computer" tab) toolbar, click Default Scan button or Right-click the selected logical drive and click Scan from the context menu or double click on logical drive to open Scan Logical Drive dialog.
In Scan Logical Drive dialog:
Is is strongly recommended to do not select folder to save scan results on drive you about to scan!
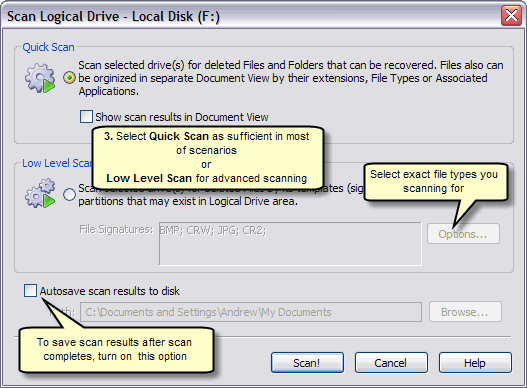
Scan for files by its signature. Each and every files format has its own unique characteristics (signatures) by which this file can be recognized among the others. Active@ UNDELETE scan can analyze the disk content for such file signatures and deliver great results. You can select desired file signatures from the list of supported files formats.
Depending on which scan type (Quick or Low Level) was selected you will receive scan results differently. In any way, you will be able to review scan results in Recovery Explorer (“My Computer” tab) and sort it by using tools Active@ UNDELETE provides (File Filter, Search and Document View). In general, you need to find and select files you wish to recover and proceed with actual recovery.
In case if you’re using Quick Scan and not found files you’re looking for – try scan again using Low Level Scan.
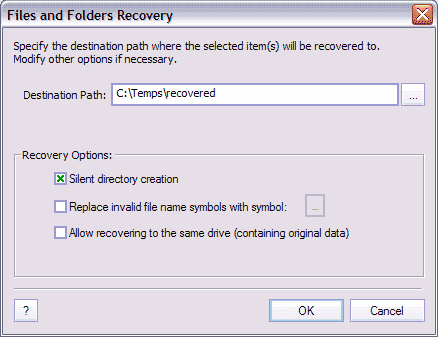
When files you seeking for are discovered, you can recover them on local computer, network drive or even burn them to CD\DVD media.
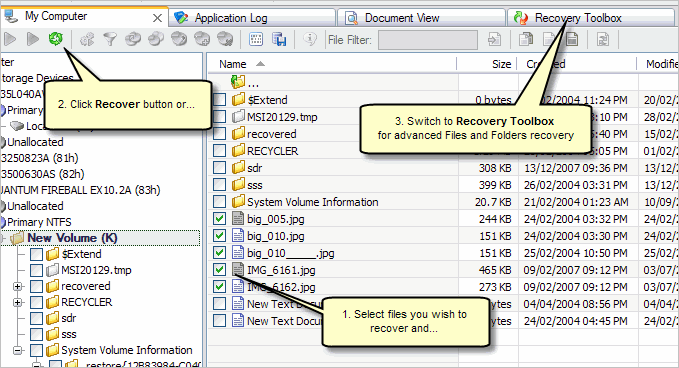
Click Recover to start recovery of selected files