Active@ UNDELETE is an advanced data recovery toolset that allows you to reconstruct damaged or broken RAIDS.
If you have a corrupted RAID configuration and one or more drives in the array are damaged, you can combine the healthy drives together with the damaged drives in a virtual disk array (Virtual RAID). If the damaged drives are inaccessible, you can substitute a "dummy" drive as a replacement. Active@ UNDELETE simulates the RAID assembly and you can scan this virtual array as a logical device.
Use Virtual RAID Assembly on page 63 procedure to create virtual array. You can create unlimited number of arrays with different attributes and disk combinations for better access.
After Virtual RAID is created you can use one of the methods below to retrieve files from assembled RAID to safe location:
You may recover damaged or deleted files and folders directly from the Recovery Explorer view , Work with logical drive scan results, Work with device scan results and Search for deleted files and folders . Recovering deleted files and folders is one of the essential features of Active@ UNDELETE.
Select files in any view mentioned above using cursor selection (Use Shift or Ctrl keys for mutli-selection).
After files are selected in a view, click Recover button in view's toolbar or use Recover command from context menu or use Ctrl+R shortcut.
By default File recovery dialog appears in simplified form — in most of the cases default recovery settings are sufficient for file recovery. However, to use advanced options click More Recovery Options button.
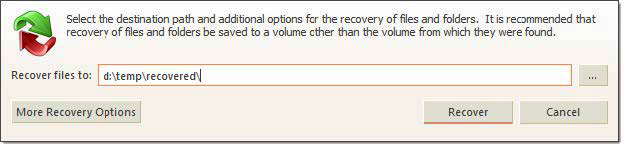
Figure 15: File Recovery dialog — simplified
Enter destination path where file will be recovered and click Recover button.
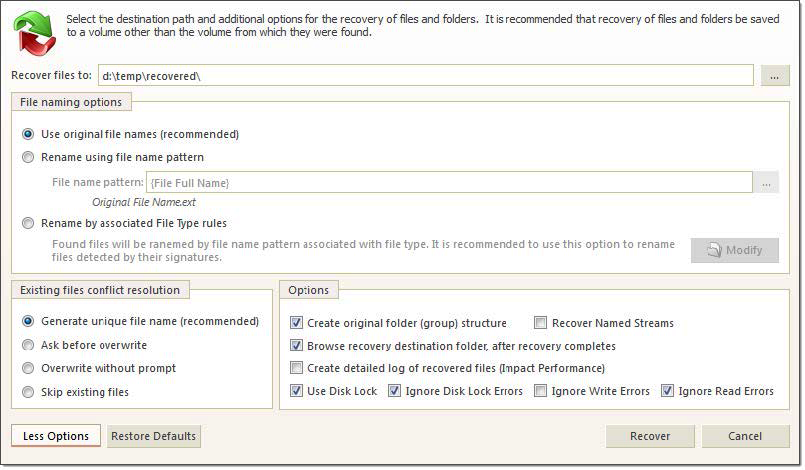
Figure 16: File recovery dialog — extended
Names of detected files will be preserved only if no file with the same name already exists in the destination directory.
All files will be renamed by their given specified file root name and added enumeration ID. File extensions remain intact.
If a file with the same name exists in the destination folder, a file with a unique name will be generated to avoid overwriting.
If a file with the same name already exists in the destination folder, the application will ask the user for a specific action to take.
All files will be overwritten in the event if they already exist in the destination folder.
If a file with the same name exists in the destination folder, recovery of a new file will be skipped.
When this option is selected files will be recovered with their original folder structures e.g. original folder hierarchy as it was on the storage source. In case files were organized in groups (date, file extensions, or by an associated application) then such groupings will be created by the folder structure in the location where the files will be recovered to.
With this option on, files will be recovered with their original name streams.
Opens the destination folder in the default OS file browser.
With this option on, the log file contains more detailed information about recovered files.
The source disk will be locked during the file recovery process. It will be unlocked as soon as the process is completed.
With this option on, the file recovery process will continue even if locking of the source device fails.
No error messages will appear and all write errors will be ignored during the recovery process.
No error messages will appear and all read errors will be ignored during the recovery process. Click Recover button to begin file recovery.
Observe recovery process and verify recovered files in destination folder. Repeat recovery process if necessary. If files were recovered successfully they will appear in destination folder. Repeat steps 1-3 if necessary.