Active@ UNDELETE is an advanced data recovery tool designed to recover data lost or deleted data, or even information from formatted hard disks.
Scan results of physical disks (storages) or logical drives (volumes) are shown in dedicated tabbed views, that has advanced tools to analyse, sort and organize the results and preserve (save) them for later use.
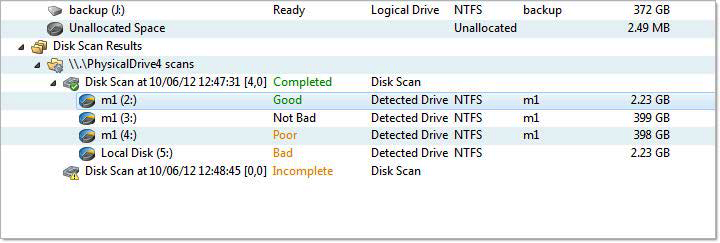
After you have completed a device scan, a Scan Results branch appears in the Recovery Explorer tree. Detected partitions are listed in order of their certainty of recovery.
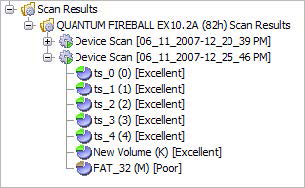
There are 12 attributes that define a partition. In some cases, the application cannot be certain that the found item actually is a partition. The rating in the order of certainty depends on how many attributes are found and what condition they are in. You may perform the following actions on partitions in the Scan Results branch:
Active@ UNDELETE is an advanced data recovery tool designed to recover data lost or deleted data, or even information from formatted hard disks.
It can take a long time to run a default disk scan or a low level disk scan. Because you are dealing with a large volume of information, you might not be able to review all the data in one session.
So that you do not have to scan a volume or physical disk again, you can save and re-use valuable scan results. You can save Scan Results branch or make a separate save for each disk scan or save all scans set for a particular device.
Scan results are saved with the file extension .scaninfo.
Warning: Save a scan results file to a physical drive that is different from the drive that was scanned.
Remember: Due to continuous activity on disk (volume) data saved in scan results become none synchronous with actual information on disk and become obsolete. Using old saved scan results may lead to unpredicted behaviour.
Preserving and using scan results for volumes and physical disks is slightly different.

Figure 24: Load scan shortcuts on Welcome View
The data from the scan results file appears in a Scan Results node in the Recovery Explorer tree.
Note: Loading scan results feature is not available in Active@ UNDELETE Freeware or Standard edition. Please visit www.active-undelete.com to read more about Active@ UNDELETE Professional and Ultimate editions
Data in the Scan Results branch is copied from the original physical device. You may remove any node – including detected partitions - from the Scan Results branch without harming the data on the original physical device.
The selected node is removed from the Recovery Explorer tree.
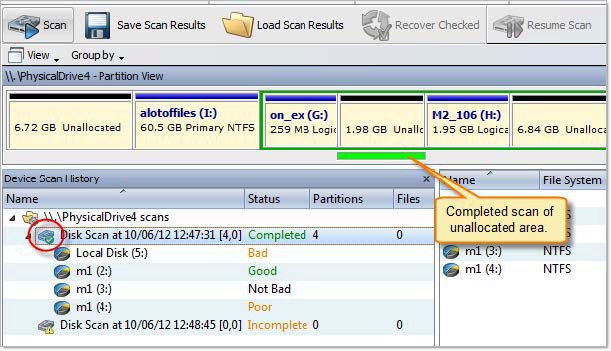
To stop a physical device scan at any time, press Stop. After you stop a scan, a Scan Results branch appears in the Recovery Explorer tree.
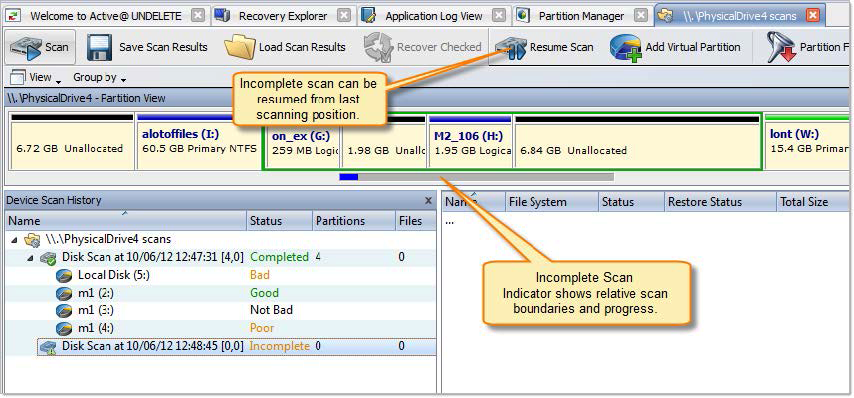
The example above shows how incomplete scan results are indicated. An icon appears next to each node in the Scan Results branch.
An incomplete (interrupted) device scan can be resumed at any time.
A completed device scan cannot be resumed.