Active@ UNDELETE is an advanced data recovery tool designed to recover data lost or deleted data, or even information from formatted hard disks.
Forensic Report is an advanced tool designed to collect files based on local user activity time frames. Files can be collected by the following date types:
When Forensic Report view opens, it will automatically parse local Windows Log records to collect information about user sessions. Each following Forensic Scan will group files under corresponding user session time frame.

Figure 70: Forensic investigation results
Scan logical drives (volumes) to complete Forensic Report.
Use this command to investigate local volumes. See Investigate volumes for details.
Use this command to re-populate local Windows Event Log. After log parsing completes, all previous volume scans will be analyzed again and the results will be shown in Forensic Report view.
Use Save Report command to save your findings to a text file. From the context menu, detected files can be inspected, opened in Disk Editor, previewed, and more.
During the scan all deleted and existing files will that match defined criteria will be collected and grouped by User Sessions. The results (report) of a logical drive scan are displayed in a separate tabbed view. To create forensic reportof a logical drive(s):
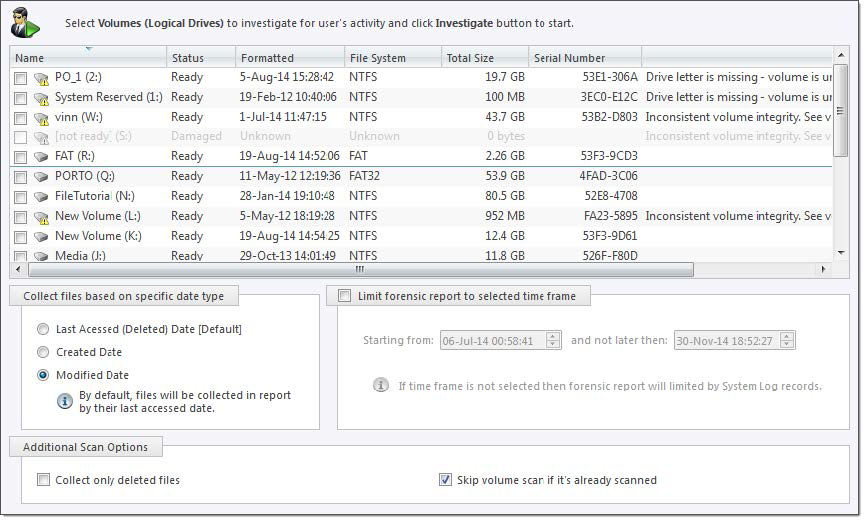
Figure 71: Scan volumes dialog
Additional drives can be selected to be scanned on the Logical Drives list. These will be scanned simultaneously.
Files can be collected by the following date types:
Use this option to ignore already scanned volumes.
Use this option to collect only deleted files in final report.
Click Investigate to initiate scans of selected logical drives (volumes) and analyze scan result based on users’ activity.
Figure 72: Scan in progress
During the scan:
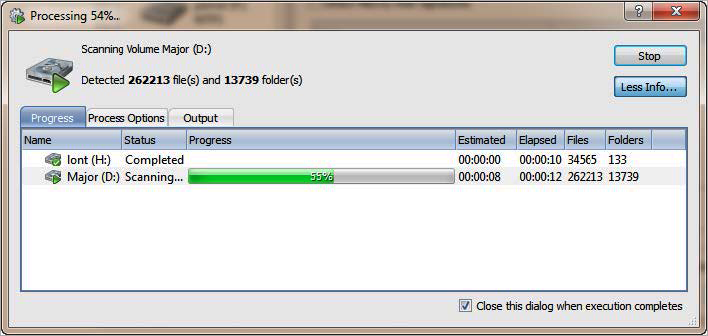
Figure 73: Volume scan result view
Final reports can be stored in a plain text file that contains lists of detected files grouped by user sessions, detailed information about scanned drives, and other user activities from Windows Event Log.